Monday, May 30, 2011

A ton of projects!

ok, well maybe not a *ton,* but a lot.  Since my last post, we have had more adventures in health care--Nina had strep, so started on penicillin.  She's never been on an antibiotic before, and it turns out she is allergic to penicillin.  Also, it turns out I don't have asthma--just had a bad bronchial infection that has cleared up with antibiotics  Thank Goodness!

Enough about that!  Now on to the fun!  We have two new babies to celebrate.  My friend Loretta had a baby boy, so he needed this:


I used my gypsy to cut out the triangles on DCWV white core.  Ran them through the Textured Impressions with a Cuttlebug Paisley folder, then sanded them.  They look just like bandanas, don't you think?  Then I hole-punched and threaded them with strips of real bandana, which I tied in the middle of each triangle.  I used Plantin Schoolbook for the letters, along with a little white gelly roll faux stitching.  Then I cut the horse, badge, and horseshoe from Create a Critter and embellished them. Finally, I freehand cut the pocket, and to make it an actual pocket, I put it together with brads, then tucked a little square of bandana in there!  <3<3


The banner below was made for my DH's new granddaughter, Kimber Rose, who is actually expected around the first of July.  I cut this banner from some pretty patterned paper that my cousin, Scrappy Java Girl Beth, gave me in a goodie box a few months ago.  I cut the letters with Gypsy Font Monogrammed Tag on the gypsy, then added the embellishments, ribbon roses (from my stash), bows (with ribbon leftover from a friend's wedding invitations), and buttons (from the stash).  I threaded the whole thing with wide white organza ribbon that I had leftover from Loretta's (the aforementioned mama of Max) wedding invitations.


The next project is a congratulatory card for a friend who is getting married tomorrow.  I am not loving it, but I want to show off my not so great work, too...it's all part of the crafting game.  I used the bride and groom cut from the Wild Card cartridge.  I used the hide feature on the gypsy to make the background cut solid, then added the original cut.  I cut the cake and flowers from Paper Doll Dress Up. The stamp is a sentiment I have in the stash, and I am not sure where it is from.  The flower is from the SU pretties kit, and colored with pastels, as are the cake and the flowers.  I also added a little stickles and glass microbeading.  Like I said...I'm not loving it, and I probably won't give it to her, but here it is anyway.  ;0)


Finally, here's one for the foodies...My son and I made cherry filled chocolate cupcakes topped with buttercream and more cherries.  I never really liked making cakes from scratch, because I live at 8,000 feet elevation, and, well--stuff doesn't always turn out too great here.  But, when my mom passed, I inherited her trusty Kitchen Aid mixer...and I have been experimenting.  I am proud to say that I have mastered high altitude baking...really.  The trick is to increase the flour, just a little bit; decrease the sugar and leavenings, just a little bit; and add a little more liquid.  Seriously, that's it.  These are the moistest, most delectable cupcakes I have ever made...truth!


My birthday is coming up June 4...maybe I will be able to come up with a fun and entertaining challenge for y'all in order to celebrate.  Love to all of you!


Jen

Sunday, May 29, 2011

test

Trying to see if I can blog from my phone  :)

Sunday, May 8, 2011

I AM alive!

So, today, I feel like Mark Twain when he said, "Rumors of my death have been greatly exaggerated!"  LOL.  It has been a long month for me.  We enjoyed our vacation immensely, but my little man picked up influenza while we were gone (despite having had a flu shot).  He gave it to his sister (also had a flu shot), who gave it to Daddy, who gave it to me (also had a flu shot).  Well, mine decided to linger...and linger...and linger....three trips to the doctor later, we have a tentative diagnosis....asthma.  Caused by the flu.  Now using an albuterol inhaler four times a day...feeling better.  However, sadly, I had to give up all my design team spots because I couldn't make the deadlines for the teams, and I was letting everyone down.  I haven't made anything fun in over a month, since before we went on our vaycay.  I'm feeling the withdrawl.  Furthermore, a crafting day is not looking like a prospect in the near future, as when I was sick, I got very far behind on my grading (ugh!) and the last few weeks of school are a nightmare of busy-ness.  PLUS, I'm looking for a new job, so that is a timeconsuming piece as well.  So, please be patient with me for a few more weeks, while I get myself together....:)

And Happy Mother's Day  to all you mamas out there....you make a difference every day!

Love,

Jen

Tuesday, April 12, 2011

Kich n Bleus Design Team Tuesday

Hooray!  It's another Kich n Bleus DT Tuesday--with a fun new twist!  Every week we are having a BLOG HOP!  How cool is that?  And you have a chance to win candy at every stop!  If you haven't started with Kich n Bleus, then feel free to start the hop there!  This month, we are showcasing the new spring collection.  I am the last stop on the hop.  If you arrived here from Kristen's blog, then you are on the right track!

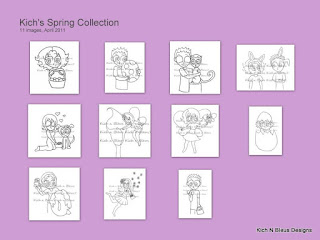
The Spring Collection can be seen below and purchased by clicking the link at left:


I really love these fun images!  My card is a birthday card for a blog friend's daughter's 17th birthday.  She is a child with special needs, and  she loves getting mail, so several of us are making and sending cards to her.  She really loves dogs. Her birthday was actually yesterday!  I didn't get the card mailed till yesterday, so I know it will be late getting to her.


The inside says, "...was doggone great!"  I used plain white cardstock for the base, a layer from the Paper Studio Birthday Matt Stack.  I colored the digi with various Stampin' Up and Martha Stewart markers.  I hand lettered the sentiment on plain white, then inked it with Cay Eye pink chalk ink.  I tied it with a ribbon from my mom's stash.  

We each are offering 3 free images from the spring collection to one lucky winner who leaves a comment on our posts.  So be sure to comment below, and hop to everyone's post!  Also,  be sure to enter the First Kich n Bleus Challenge, where you will receive a free digi to use for your project, and you will also receive the new fairies and flowers mini collection just for entering!

Here is the complete hop order:


Kich N Bleus Designs~~ www.kichnbleusdesigns.com

Happy Hopping, and don't forget to leave a comment below!


Jen

Monday, April 11, 2011

Paper Playtime Weather Challenge!

Hi, all, and welcome back to another edition of Paper Playtime's monthly challenge.  This month, the challenge is to create a project involving the weather...

I have a friend at work who has been having a bit of a struggle, so I thought I would make this card for her...


Since it is so tiny, I will describe it in detail for you.  My camera died, and I have been uploading the pictures with my cell phone.  Sorry about that, and I will get it remedied ASAP.  The base is a piece of 6"x8" deep purple Core'dinations cardstock from the jewels stack.  This is followed by a layer of peach SU patterned paper, and a layer of forest green DCWV White Core from the Neutrals Stack.  The rainbow is cut from Create a Critter, on scraps from the scrap bin, then accented with Stickles.  The metallic gold trim (which looks like gold coins to me) is from what I found in my Mama's stash after she passed in January.  The sentiment is printed from my computer, a take on song lyrics from long ago "If you want to see a rainbow..."  I inked the edges of the sentiment in green Cat Eye chalk ink.


The inside features a cloud and raindrops cut from Create a Critter, then inked up with Silver Cat Eye ink.  The sentiment on the inside says, "...you have to put up with the rain!"  Printed from my computer, and inked up with Cat Eye Chalk ink.  I hope you enjoy this card, and that you will play along at Paper Playtime.  Janis always offers fabulous candy!

Jen


Saturday, April 9, 2011

Another Award...how fun!

Hi, all...


Well, when I finally got back online today, I was pleasantly surprised to learn that I had been awarded the Versatile Blogger Award by two online friends, Jenn at Craftyful Gardens and Michelle at Upsy Daisy.  How sweet of them, dontcha think?!

In order to claim this award, you must tell 7 relatively unknown things about yourself, and then pass the award on to 15 other bloggers.

So here goes:

1.  I am a rabid basketball mom--it is my dirty little secret
2.  I am a Seventh-Day Adventist
3.  I have been married for nearly 22 years to the greatest man in the world
4.  I have been teaching at the same school for so long that I now have "grandstudents"
5.  I am a fan of the Star Wars epic, and my son and I compete in Lego StarWars as often as possible
6.  I am a certified K-12 Principal in 6 states and currently "shopping" for my first principal assignment
7.  I attended 18 different schools in 13 years.  Maybe that's why I have worked at the same one for so long.  LOL.

Fifteen Recipients of this award from me--they are doing amazing stuff, so please check them out!

1. http://craftingwithsarah.blogspot.com
2. http://bellascrapbookdesigns.blogspot.com
3. http://scrappingmamahen.blogspot.com
4. http://callahancountrybugs.blogspot.com
5. http://krystalskreativity.blogspot.com
6. http://canadiancraftcorner.blogspot.com
7. http://myneed2craft.blogspot.com
8. http://kreativekristie.blogspot.com
9. http://ownhomedog.blogspot.com
10.  http://scrappyjavagirl.blogspot.com
11.  http://raspberryandlimedesigns.blogspot.com
12. http://purplemonkeymoments.blogspot.com
13.  http://ladybug820.blogspot.com/
14. http://itstoristime.blogspot.com/
15. http://sweetmagnoliarose.blogspot.com/

I hope you all have fabulous day and enjoy the rest of your weekend!  The wind is blowing here, once again--welcome to spring in my end of the world!

Jen

Friday, April 8, 2011

Well, I'm back....with a New Flaunt It Friday Challenge


Hi y'all!  I have been soooo super busy, and I have not had an opportunity to get much blogging done.  However, today is another Flaunt It Fridays challenge, so you know I had to get back in gear!  The challenge this week is to use the Country Life cartridge sheep.  But of course I don't have that cartridge (LOL!) Sooooooo....I used Create a Critter....again!  :0)

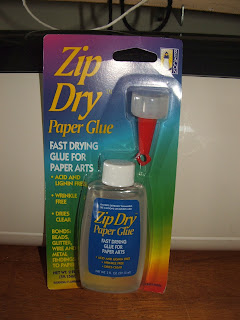
This is a swing card that I found on a tutorial at Splitcoast Stampers!  I love that place!  The base is textured cardstock from the DCWV Brights White Core Stack.  I then used the SU Stampin Around Swirls with Versa Mark to add the watermark to the front.  I inked the edges with white Colorbox pigment ink.  It is layered with green patterned paper from SU.  I cut all the layers of the sheep at 2 3/4", then glued them together with Zip Dry paper glue!  (LOVE IT!)

The inside says, "Thank Ewe!" in hand lettering using a MS glitter paint pen.  I apologize for the poor photo quality.  My camera died and I am having to use my phone for now  :0(

Have a great day and enjoy the challenge!  You have till next Thursday at midnight to enter!

Jen

Tuesday, March 22, 2011

A Birthday Card!!!

Wow, I haven't made a "special" birthday card in a long time.  But I had to try Birthday Sundaes inaugural challenge.  And I decided to enter this in the 365 Cards ABC Challenge, Pause Dream Enjoy's Fancy Fold Challenge, and Crafty Cardmakers Special Birthday Challenge.


This was my first time ever making a tri-fold style card.  Amazingly Enough, I didn't use my Cricut--Was feeling really lazy!

Recipe:
DCWV Textured White Core Cardstock in Turquoise
Paper Studio Birthday Extravaganza Mat Stack (LOVE THIS!!!!)
Ribbon Scraps
Buttons
Brads
Decorative Clip
Embroidery Floss
Foil Stickers
Vellum Stickers

I am totally loving how it turned out!  A card like this is really cool because you can use up all your scraps, plus it looks like it took hours (well, it DID take an hour and a half, but that was with a few pauses for bedtime stories, prayers, and snuggles).

Head on over to these challenge sites and try your hand at any of these fun challenges!  And let me know what you think!  I read every precious comment, and I love new followers friends!

Jen

Blog Hop Winner--A Little Late

Hey, there!  So sorry this is so stinking late!  It has been a crazy week, and it's only Tuesday...whew!  But the winner of my "I'm So Lucky" Blog Hop Grand Prize Candy is

Jenn N.

Yay, Jenn!!!

You have till midnight Thursday to message me with your snail mail address, and I will get it out to you!

Thanks so much to everyone who hopped along with us and became new followers friends.  I appreciate so much all the new people I have met through this whole bloggy adventure!

Jen

Kich N Bleus Design Team Tuesday

Hi, Everyone...

Today is another fun day at Kich N Bleus Designs.  This time we are showcasing the Kich Travels set, which you can purchase here.  My favorite, favorite image from this set is the one with Kich soaking up the sun on a chaise lounge.  Living in Colorado, and being really tired of winter, I am eagerly awaiting my vacation next week!  It will be sunny and tropical, and I can't wait!!!  In honor of this, I have created a gift bag, and a matching card.


I colored the digi with chalks this time.  I "enhanced" the glasses with a little SU Crystal Effects.  I love that stuff!  I adhered it to a mat featuring SU patterned paper and DCWV paper.  I adhered it to the gift bag, added ribbon, and there ya go.  Very simple, but I'm loving how it turned out.  I'm also loving this orange and pink color combination, which I have spent a lot of time with this week, if you noted my previous post!

Everyone have a fabulous week, and I'll see you back here this weekend!

Jen

Sunday, March 20, 2011

Crafting with Cristina Challenge

So, I have been having this wild infatuation with Hot Pink and Orange together lately.  It's so weird because I don't normally like orange--AT ALL--and I love pink, but it is a paler shade rather than hot pink. Then I saw that Cristina at Crafting with Cristina is having a Hot Pink and Orange Challenge!  Woohoo!  Now I know.  I actually have two projects to enter in the challenge, which can use any other colors as well, as long as Hot Pink and Orange are prominently featured.

Entry #1

A scrapbook page from my daughter's 2008 album, which is currently in progress.  I created this page yesterday. (I know, I know, but at least it's gradually getting done).


Recipe:

Hot Pink Core'dinations Textured Cardstock Background 12x12
DCWV Patterned Floral Cardstock for photo mats and bathing suit
Paper Studio Pink Paisly patterned paper for photo mats and towel
Peach Core'dinations Textured cardstock for photo mats and journaling box
DCWV green textured cardstock for lotion bottle
Turquoise Core'dinations Textured cardstock for title
Color Box Cat Eye White Ink for title
Stickles
SU Stampin Write Old Olive Marker

Entry #2

A set of cards, in a box, that I made for my dear friend Jennifer, who has a birthday tomorrow, so I made her this today.


I normally don't get this ambitious when creating!  But I had some time and the motivation today!

Recipe:

DCWV Glitter Stack Papers--Brown Stripe and White Pattern
DCWV Textured White Core CS--Pink and Orange
Pink Toile Paper (Paper Studio, I think)
Vellum
Box cut from Wild Card for Cricut cut using Fit to Page
Acetate (for box window) run through cuttlebug
Assorted Cuts from DoodleCharms for Cricut cut at 2"
Cuttlebug folders for bugs and flower
Assorted Ribbons
Cards are 4 1/4"x4 1/4
ATG Adhesive

I put these in a SUPER cute gift bag that will be posted on Tuesday as part of my Kich n Bleus designs DT project.

Have a great week!

Jen

Thursday, March 17, 2011

My Fist Time Hosting a Blog Hop! I'm So Lucky!!!

Recent events in my life have led me to reflect and contemplate the many, many blessings of my life.  I am the princess daughter of a Heavenly King; I have an amazing (I mean, AMAZING) husband with whom I have shared my life for 22 years.  I have two beautiful children, two handsome stepchildren and two exceptional step-grandchildren.  I was blessed to be raised by a mother who loved me unconditionally and taught me the value of service to others.

I decided to host this blog hop to showcase the many blessings of life, and I invited fellow bloggers whose work I admire, but who also love to share their blessings with others.

I am the first stop on this hop, so if you just happened by, make sure you get to the other blogs on the hop in order to be blessed!  And I have some fun blog candy too.  

This hop is about blessings, and I have chosen two layouts to share that I think showcase the blessing of friendship.

This first one is a carnival layout from 2008.  My children and I were invited to spend the day with some friends at a local festival carnival.  We had such an amazing day.


This layout features cuts from Everyday Paperdolls and Paper Doll Dress Up, along with some Gypsy Wanderings (for the frames) and Plantin Schoolbook for the title.  I put all the cuts on my Gypsy and did the layout on there to make sure all would fit.  Then I added stickles and SU Crystal Effects.  

The second layout features my three best girls:  my daughter and two of my best friends.  We took a fun road trip, and I took this picture of the three of them at one of our pit stops.


This layout was very simple, with 1 1/2" squares of different papers accenting the photo.  The only Cricut cut is the large purple flower next to the photo--from Accent Essentials.  

This hop is sponsored by the great people at Beacon Adhesives, manufacturers of Glitter It and Zip Dry.  

The blog candy up for grabs in this hop includes a bottle of Zip Dry (donated by Beacon), a pack of Paper Studio Brads, a Fiskars Paper Tearing edge, a pack of DCWV Safari Die Cuts, and a cute padded address book.  ONE winner will receive ALL of these prizes. (Pictures of Each Candy Item at the End of this Post). 

In order to win the blog candy, you must:
1.  Visit all the blogs on the hop list below and leave a comment on each
2.  Create a project that showcases one of your many blessings and post it using Mr. Linky
3.  If you are not already a follower of each blog, become a follower of each, then leave another comment here on my blog letting me know that you are now following all of the blogs in the hop.  This will get you an extra chance to win.
4.  Have a US or Canada mailing address.  

Submissions close on Sunday, March 20 at midnight, so work diligently to get your project posted by Saturday night.  I  can't wait to see what you all create!

The complete lineup for this hop is:
(Some sites have the list incorrect due to last minute cancellations--this is the CORRECT list!)

Jen H. (Me)   HONEYBEAN CREATIONS  http://huffinatorshangout.blogspot.com
Beth  YOUR NEXT STOP:  SCRAPPY JAVA GIRL   http://scrappyjavagirl.blogspot.com
Paula  RASPBERRY AND LIME DESIGNS  http://raspberryandlimedesigns.blogspot.com
Gigi  THE CRICUT BUG    http://thecricutbug.blogspot.com
Jen C.  THE PURPLE SCRAPBOOKER    http://www.purplescrapbooker.com
Cheryl PINK AND PAPER  http://pinkandpaper.blogspot.com
Sharon  MEEMEE’S CREATIONS   http://meemeescreations.blogspot.com/
Michelle  PURPLE MONKEY MOMENTS  http://mumoftwoblog.blogspot.com/


Monday, March 14, 2011

My First Paper Playtime DT Project

Hi, all...

This week over at Paper Playtime, it is the challenge teams turn to play and design for you.  This is a "Choose Your Challenge" Monday...our options were:
1.  Purple and Green
2.  Pink and Glitter
3.  Critter and a Rhyme

Though I LOVE Create a Critter, I had to go where my heart was....pink?  glitter?  pink and glitter?  You know it!

I decided to create an "identifier" tag for my suitcase to make it easier to spot on the baggage carousel...I HATE waiting around to figure that one out.


I used Tags, Bags, Boxes, and More on my Gypsy.  I cut the tag 8 times on plain white card stock at 3 1/2"  Then I cut the window and the blackout as well--I cut these on DCWV patterned paper.  I glued all the white layers together with Zip Dry Paper Glue...now, if you haven't tried Zip Dry yet, you just gotta...it is the BEST glue ever...seriously.  Dries quickly, no bubbles, no warping...LOVE it.  I used a MS red paint pen to ink up the edges of the 8 glued-together tags.   Once this dried, I glued on the window tag to the front, and the solid tag to the back.

To embellish the tag, I cut the suitcase from the Hello Kitty Greetings cartridge at 1 3/4" on plain white paper.  I then cut the layer on a piece of pink scrap paper and added Stickles.  (Did I mention that I love glitter?)  I adhered this to the window section of the tag with Zip Dry.  Then I painted the entire thing with Mod Podge to add a bit more sturdiness and structure to it.

I added a little chain, a few pieces of ribbon and ricrac.  I attached it to my suitcase.  Now, when I'm at the baggage carousel, I'll be able to spot my cutie tag and know that's my bag!  Neither picture is very good; sorry bout that!

Thanks for looking at my project...
Have a FABULOUS day!

Jen

Tuesday, March 8, 2011

My Very First Kich n Bleus Design Team Project

I am so excited to be part of this DT!  I love, love, love these whimsical "digi's." This time, we are showcasing the "Kich Goes Irish" collection.  It is available for purchase through the button on the right of my blog under "Those I'm Blessed to Design With..."

For my card, I chose to make something for my honey...he is so good to me and to our children.  He is a fabulous human being...here is the front of my card...


The card is a piece of DCWV cardstock from the Grade School Stack, cut at 4 1/2 x 9 and folded in half.  I printed the digi on plain white cardstock, and colored it with a combination of SU markers, MS markers, MS paint pens, and crayons.  The shamrock is cut at 2" from Paper Doll Dress Up for Cricut.  I printed the sentiment on plain white cardstock, then used the "centerpoint" feature on the expression to cut it out.  The ribbon is from Hobby Lobby.  The digi and shamrock (which is inked with colorbox cat eye ink) are adhered with Elmer's dimensional tape for "pop."  

The inside is simple...Sentiment printed on a piece of plain white cardstock...then corners cut with Creative Memories paper edgers, then inked with colorbox cate eye ink.  Adhered with ATG general purpose adhesive.


Thanks for looking!

Be sure to stop by Kich n Bleus designs and check out all the other DT projects for this week!

Jen

Sunday, March 6, 2011

A Card for Julia...Plus a Plug for Birthday Sundaes

There is a new blog out there in Blog Land--Yay!  It is a challenge blog, dedicated solely to birthday projects.  How fun is that?!  What a cool idea because who doesn't always need a birthday card or gift to give to another, right?


They are having a challenge right now, to help promote the new blog, so your really should check it out
here.  There is blog candy involved, too--fun, right?


A little about the new challenge blog:
Birthday Sundaes is a weekly challenge blog beginning March 20, 2011.  The goal of Birthday Sundaes is to build up those birthday card stashes!  I just love to make birthday cards and hope you do too! Types of challenges Birthday Sundaes will be hosting are color, supply, recipe, inspiration & technique challenges incorporated into birthday themed cards.


In keeping with this happy theme, and because my friend Saundra at Luv Scrapping Together has a beautiful daughter with a birthday this week, I created this card...it is the first easel card I have made in a long time.


I used a 4x 12 piece of white Core'dinations cardstock as a base.  Scored at 3" and 6".  Then I cut a piece of yellow Core'dinations cardstock at 4x6.  Next, cut a piece of blue DCWV textured white core card stock and ran it through the Textured Impressions with the Cuttlebug Paisley folder.  I used my Gypsy and the Gypsy font to make the word "you're" and the number 16, and welded them together.  I cut the 16 again on thick cardstock and adhered it to the first layer.  I covered the 16 and you're with Stickles, adhered this to the card with Zip Dry.  I added a crocheted flower sent to me by a friend.  I adhered the bottom half of the yellow cardstock to the bottom part of the front of the white card.  For the inner sentiment, I used my Gypsy to cut the word "Sweet!" from Create a Critter  on a piece of Cardstock from the DCWV All Dressed Up stack.  I stretched it to make it a bit taller than it is on the cartridge.  I backed it with blue DCWV white core cardstock, then another piece of yellow Coredinations cardstock.  I adhered this with Elmer's dimensional tape to make the easel holder.  Hope you like my creation, and don't forget to go over to Birthday Sundaes.


Jen

I'm Flattered by Another Sweet Award


Thank you to Paula, from Raspberry and Lime Designs, for this award. I was very honored that you thought of me! Please visit Paula's blog and check out her super cute projects.


The Liebster Award is designed to bring new blogs to light.  It is a great way to share blogs that might not otherwise be seen, or blogs that you may want to share with others. I am here to honor these blogs and to bring awareness to other wonderful blogs.


As a recipient you must share the love and pay it forward by: 1-Creating a post where you blog about the Liebster award & reveal your 3-5 blog picks, 
2-Let them know you chose them,
3-Copy & paste the blog award on your blog,
4-Have faith that your followers will rally & show their crafty love back out to those you awarded,
5-Have fun!

Here are my award choices, go on over to their blogs and support them by becoming a follower:


Saturday, March 5, 2011

Even More Excitement--Plus a VERY SPECIAL BOX!

Hi, y'all...Today was another really wonderful day...aren't they all?   We are alive and so blessed.  I have more exciting news!  I have been selected for the KichnBleus Digital Design team.  These are fun, fun, fun digi stamps designed by Kich Mendoza.  They are available for sale by clicking the button on the right side of my blog.  I am really excited to be part of this team, of course!

My project today is something I have wanted to create for a long time.  It is an Ebenezer box.  What is an Ebenezer box, you ask?  It is a creation invented by a member of my church, Geri Morrison.  It is a reminder of 1 Samuel 7:12.  The children of Israel had been at war, and Samuel paused to give thanks to the Lord by erecting a stone, which he called "Ebenezer".  The purpose of the box is to stop and remember all the times that the Lord has provided answers to prayer...these are written on slips of paper and put in the box.  I have been keeping track of these events...so many of them...and they are now resting in the box.

I got an unfinished treasure chest at Michaels, then sponged it with colorbok cat eyes to resemble a camo pattern.  On top, I glued a rock, my "Ebenezer."  Then added the verse on the outside.  On the inside, I added a commentary by our Adventist Prophet, Ellen White.  I hope you will "lift" this idea, and that you will document the times during which God has held you in His mighty hand.


Jen

Friday, March 4, 2011

Flaunt It Fridays--Twinkle Toes

This week over at Flaunt It Fridays, we are flaunting the girl ballerina from Twinkle Toes.  I don't have that cartridge, unfortunately, BUT--I DO have Paper Doll Dress Up.  I absolutely adore this cartridge because it offers so much versatility.  On the cartridge, there is a ballerina cut, so I used it.  I decided I wanted to try my hand at a pop-up card.  I found the tutorial at Splitcoast Stampers.


I have to say, I love her!  She is really happy!  I drew her face with gel pens.  The background is DCWV white core cardstock, and all other pieces came from the scrap bin.  I inked the edges of the dress, shoes, and hair with colorbox cat eyes (love those too!)  I ran the background through my Sizzix Textured Impressions machine using a Cuttlebug folder.  And GASP!  did you notice.....No Glitter!!!!!!!!!  Almost died from withdrawls, but I'm coming out of it now!

Head on over to FIF and show us how you flaunt it!  You know you want to!  Come on...all the cool crafters are doing it!  LOL!

Enjoy!  (And come back tomorrow for more exciting news!)

Jen

Tuesday, March 1, 2011

Excitement!!!!

I am now a Queen at Paper Playtime!  Hip, hip, hooray!  This is a biweekly challenge blog, and I just love all the great projects over there!  Check it out!  More posts coming this week---stay tuned!

Jen

Sunday, February 27, 2011

My Children are now officially bloggers!

So, my kids were so inspired about blogging when they hopped along on the kids' blog hop hosted by Scrapbookaholic by Abby that they asked to create a blog of their own to showcase their creations.  You can check them here.  The blog name is a spin on "Phineas and Ferb."  Nina's nickname (in addition to Honeybean) is Birdie...and when she was small, she called Phillip "Phobbit."  Check it out and show them some love...they will be jazzed!

Jen

As, promised...the cards!

Here are the six cards I made to put in the box.  These will be a gift for my stepson's girlfriend, whose favorite color is red.  I had fun making these.  All cuts are from Hello Kitty Greetings, cut at 2 1/2"--Decorated with stickles, ribbon, cuttlebug folders, etc. Enjoy!

The crocheted flower on the card in front, on far right, was made by
Scrapbookaholic Abby's grandmother...I received it as a gift
in some happy mail last week.  :0)


Jen

Friday, February 25, 2011

Flaunt It Fridays--Tags, Bags, Boxes and More

Hooray!  I get to design for Flaunt It Fridays AGAIN this week!  Superb, right?  The cut this week is the matchbox two cut from Tags, Bags, Boxes and More.  I have this cart only on my Gypsy, so it was a different experience.


I loaded the base image, then used the window feature to add the top part of the box with the window cutout.  If you select both images BEFORE returning to the mat, they will be compatible sizes.  I put each part of the box on a separate layer.  Then I stretched both sections until the box would fit a set of 4"x6" cards.  Just make sure you look at the measuring tools and keep the measurements the same for both boxes.  I cut the box using DCWV Glitter Stack paper, with the Cricut on max speed and max pressure.  This paper can be a bit rough on blades, so if you have one that is a bit dull, that is the one to use.  Assemble the box by scoring on the score marks and adhering with liquid adhesive (I LOVE Zip Dry by Beacon Adhesives) or with Super Sticky Tape.  I push the corners on the bottom part of the box in a little further than the outer edge and trim the excess.   On the top part of the box, I keep the corners a little wider, so the box will fit together more easily.

I cut a piece of clear acetate at 4x6 and adhered it to the inside of the top.  The flower is from the SU Pretties Kit, colored with Martha Stewart markers.  Stick pin and beads also from the Pretties Kit--red beads were in the stash.

I am working on a set of cards to put in the box.  I will try to get pictures posted this weekend. Thanks for looking!

Enjoy!

Jen

Sunday, February 20, 2011

Tacky Tuesdays Challenge--Chick

 Tacky Tuesday's is a Facebook Group...each month Ruth creates a challenge based on a "tacky" cut from one of the Cricut cartridges.  This week's cut is the chick from Simply Charmed.  I don't have that cartridge, BUT I do have Create a Critter--which you all have to know I love, because almost every project lately features it!  Lol...but anyway, I decided to make an Easter card for my cousin, Derek.  He is awesome!  And a famed bachelor.  He is also a single dad to a precocious but precious little girl, Amie.  So this card is for both of them...a smart aleck sentiment for D--and a Shrinky Dink chick magnet for Amie.

Front of Card...sun and eggs from Doodlecharms.  I colored chick with sharpies and then did faux stitching.  Added orange slick paint feet.  I drew the faces on the sun and the chick.  Sentiment is also hand written.


This is the original inside of the card...I cut the chick using the Fit to Page feature on an 8 1/2 x 11 piece of Shrinky Dink material.  As I've said before, I use a blade that is too dull to cut paper, and a separate mat that is reserved only for shrinky dink and chipboard.  The cut ended up being 9"--always use the multicut feature set on 4--max pressure and max speed.  I colored the chick with Sharpies.  I drew the face and faux stitching with Sharpies--filled in the White with paint markers.  Then shrink in 275 degree oven for about 5 minutes--till all the curling and warping is flattened out.  I put stickles on the belly and cheeks.  Add magnet tape behind the belly, cheeks, and eyes, so it won't show through.


The inside of the card looked a little plain to me, even after I added the sentiment, so I took a clue from Joy at Obsessed with Scrapbooking and added some strips of paper to the inside.  What a huge difference that made!

I'm really liking it, and I hope you do too!

Jen


Friday, February 18, 2011

FCCB--Challenge Me Monday --About the Weather


The Monday challenge at Fantabulous Cricut Challenge Blog this week is to create a project about the weather.  Well, I have a very good friend, the Other Jen, who is always saying "Life isn't about waiting for the storm to pass...it's learning to dance in the rain."  Last week, she had a particularly rough week.  She is the director of Exceptional Student Services at our school, and she works with some of our most challenging learners--and staff--in order to ensure success for our kids with special needs.  She is awesome at it!  But it is tough.  I wanted to make her a card to show her some support.  When I logged on last night to see what the Monday Challenge was, this card came into my head.  The rain drops are from Gypsy wanderings, rotated slightly and laid out on the Gypsy.  I cut out the blue card overlay, adhered it to the top of the card, then added Stampin' Up Crystal Effects to create the water effect.  The Duck, Umbrella,  and Puddle are from Create a Critter.  Cut at 3 1/4 inches.  I also used the rain drop cutouts on the inside of the card to create a splashing water effect.  The best part is, everything except the card base came from the scrap bin!  I adhered the Duck with an Action Wobble Spring, so it would look like she is actually dancing in the puddle.  I just used my computer and some Creative Memories scalloped scissors to cut out the sentiment.  Thanks for looking.  I hope you enjoy my creation.

FIF Design Team--Forever Young Challenge


Hi, there, everybody!  This week's cut is actually from Forever Young, but since I don't have that cartridge, I used Gypsy Wanderings for the silhouette.  I cut my oval card from Wild Card.  The decorative oval filagree also came from Wild Card.  I used Printing Press for the scalloped oval.  I cut the white oval card, and inked up the edges.  I added the scalloped oval, cut from DCWV All Dressed Up stack.  Then I added the vellum layer, the oval filagree.  On top of this, I put the silhouette.  I added stickles and a few flowers from the Stampin Up Pretties Kit...I colored these with SU markers and glued them on.  I'll be sending this card to my Granny for her 92nd birthday in April....can't wait!  Thank you for looking, and I love your comments, so keep them coming!  Have a fabulous Friday, and I can't wait to see what you will create!

Jen

Sunday, February 13, 2011

WINNER of FIF PAPER DOLL HOP!!!

And the winner of the PPDU blog candy is:  SHARON!!!!  Yay, Sharon!!!  Sharon is one of my DT sisters over at FIF!  I have been through quite an ordeal lately, and these ladies have sure helped me through it!  PM me you address, Sharon, so I can mail this fun candy to you!


39 
Sharon said...

Love the magnet paper doll! Great idea!!! The layouts are awesome!!! Love how you did the photo
on the first one! :)